
Install Kali Linux on Windows 10:- Kali Linux is an open-source Linux distribution focused on cybersecurity that requires a lot of customization for penetration testing that helps companies understand their vulnerabilities. Kali Linux is funded by Offensive Security. This is basically an ethical hacker’s dream operating system as it has most of the tools you need built in.
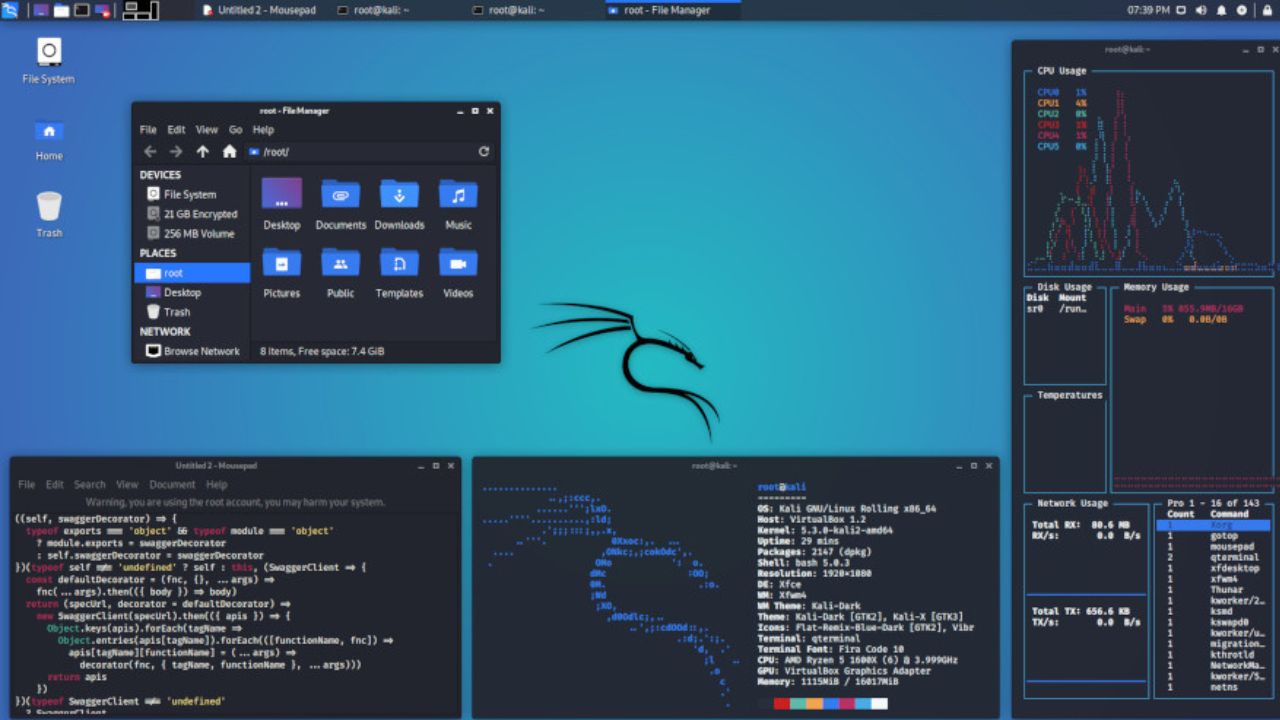
I will show you How to Install Kali Linux on Windows 10 or 11 on your Laptop or Desktop PC. Installing Kali Linux is a bit complicated, the potential for data loss is high, and one mistake can destroy your data in an instant. Kali Linux was recently released as an application in the Microsoft Store. Kali Linux can now be installed on Windows environments by using the Windows Subsystem for Linux (WSL) compatibility layer. WSL is a Windows 10 feature that allows users to run native Linux command line tools, bash, and other previously unavailable tools. Designed primarily for developers, this feature adds versatility to Windows 10 and provides an alternative to virtualization. You can Install Kali Linux on Windows 10 or 11 with the help of this article.
This tutorial provides step-by-step instructions on how to exactly create a bootable USB stick to Install Kali Linux from USB to your PC or laptop, how to install a new SSD for installation, and how to install Kali Linux on Windows 10.
Install Kali Linux on Windows 10
To install Kali Linux from USB, you first need to create a bootable USB and set up a flash drive with a least 8GB of free space. Next, all you need is an accessible Windows 10 or Mac Computer to create a bootable pen drive and you need an image flash software called Balena Etcher. This is a decent image flash software and is easy to use on Windows and macOS. Generally, there are two ways of installing Kali Linux on Windows 10 by using VirtualBox or VMware. I prefer using VMware because VMware Interface is simple and easy to Install Kali Linux on Windows 10.
Kali Linux Minimum Requirement
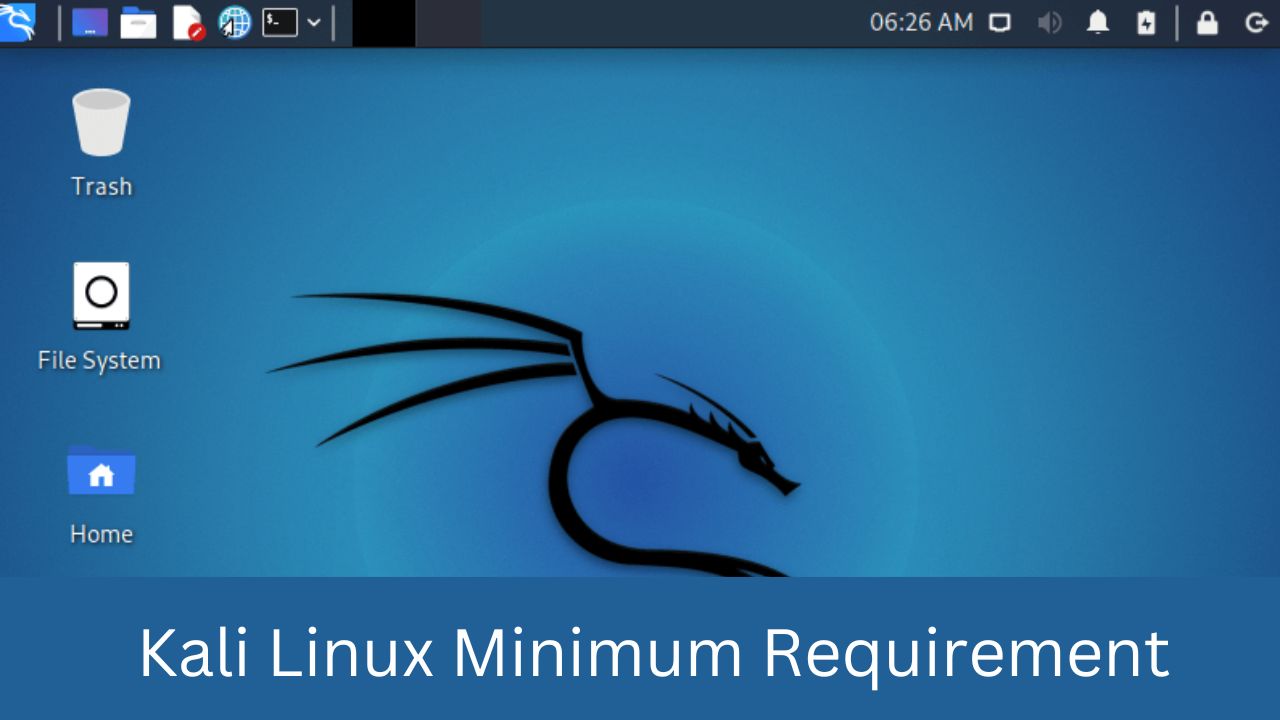
- A minimum of 20 GB of free space in your hard drive is recommended.
- At least a minimum of 4 GB of ram is required when using VMware or VirtualBox.
- A CD-DVD or USB is required for the installation.
Step 1: Install VMware
To run Kali Linux, you first need some kind of virtualization software. There are many options to choose from, such as Oracle’s VirtualBox, but I prefer to use VMware. After the installation is complete, launch VMware from your applications folder.
Step 2: Download Kali Linux and check image integrity
To download Kali Linux, visit the official download page and choose the one that best suits your needs. Also, on the download page, you will find a bunch of hexadecimal numbers. And this is not here for fun. Kali Linux is designed to be used for security-related tasks. Therefore, you must verify the integrity of the images you download. You should check the file’s SHA-256 reference and compare it with the one provided on the download site.
Step 3: Launch a new virtual machine
On the home page of VMware Workstation Pro, click on create a new virtual machine, select the Kali Linux ISO file, select the guest operating system and configure the virtual machine details (here, Kali Linux). Start the virtual machine by selecting the Kali Linux virtual machine, then click the green “Power on” button. By following the below steps you can easily Install Kali Linux on Windows 10.
Installation Procedure of Kali Linux
Step 1: After powering on the machine, you will be prompted to select your preferred installation mode from the GRUB menu. Select graphics settings and continue.

Step 2: The next two screens will ask you to select local information, such as your preferred language, country, and keyboard layout.
Step 3: Once the local information is browsed, the loader automatically installs additional components and configures your network-related settings. Next, the installer will ask you for the hostname and domain name for this installation. Provide the appropriate information for the environment and continue with the installation.
Step 4: Set a password for your Kali Linux machine and press continue. Don’t Forget this Password.
Step 5: After the password is set, the installer will prompt you to set the time zone and then pauses the disk partitioning. The installer will now provide you with four choices about the partitions of the disk. The easiest option for you is to use ‘Guided -Use Entire Disk’. Experienced users can use the “Manual” partitioning method for more granular configuration options.
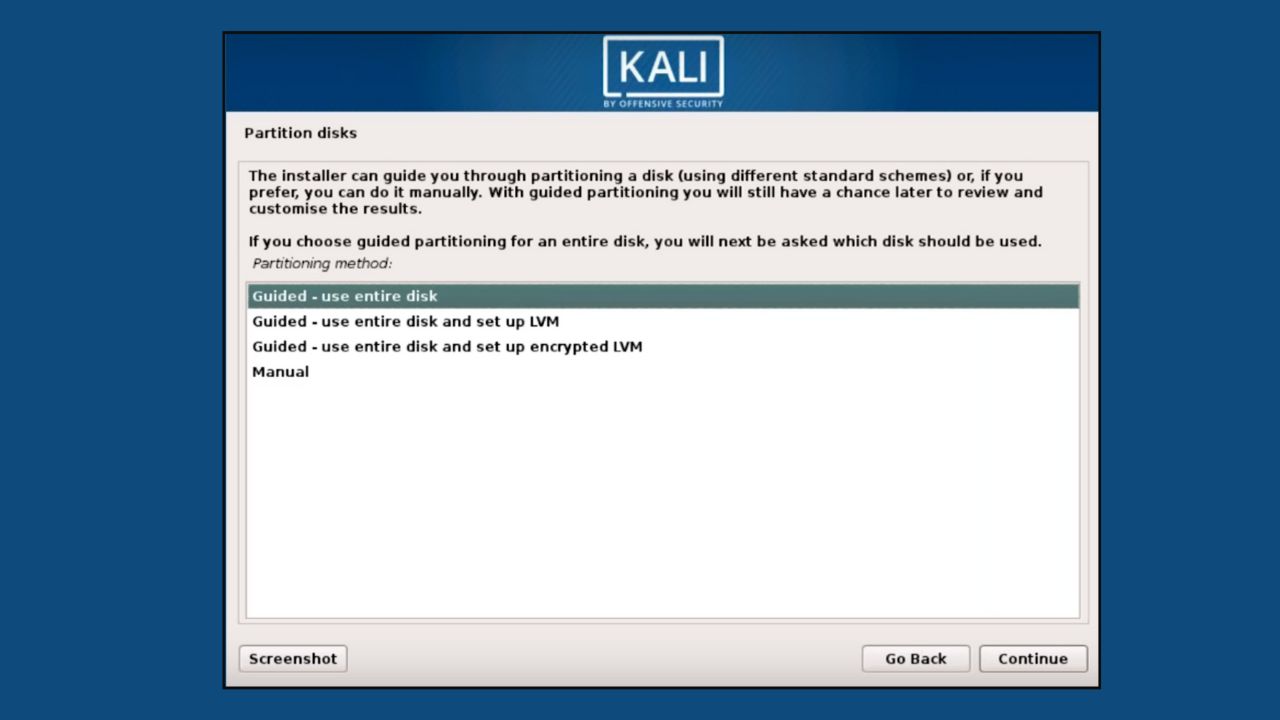
Step 6: Select the disk partition (recommended option is all files in one partition for new users), then press continue.
Step 7: Confirm all changes to be made to the disk on the server. Please note that if you continue, the data on the disk will be erased. Once you confirm the partition change, the installer will run the file installation. Let it install the system automatically, it may take a while.
Step 8: After the necessary files are installed, the system will ask if you want to set up a network mirror to receive future software updates. Make sure to enable this if you want to use the Kali Linux repository.
Let it configure the package manager-related files, then.
Step 9: You will then be asked to install the GRUB bootloader. Select “Yes” and select the device to write the necessary bootloader information to the hard drive required to boot Kali.
Step 10: Once the installer has finished installing GRUB to the disk, click Continue to complete the installation, it will install some files from the last step.
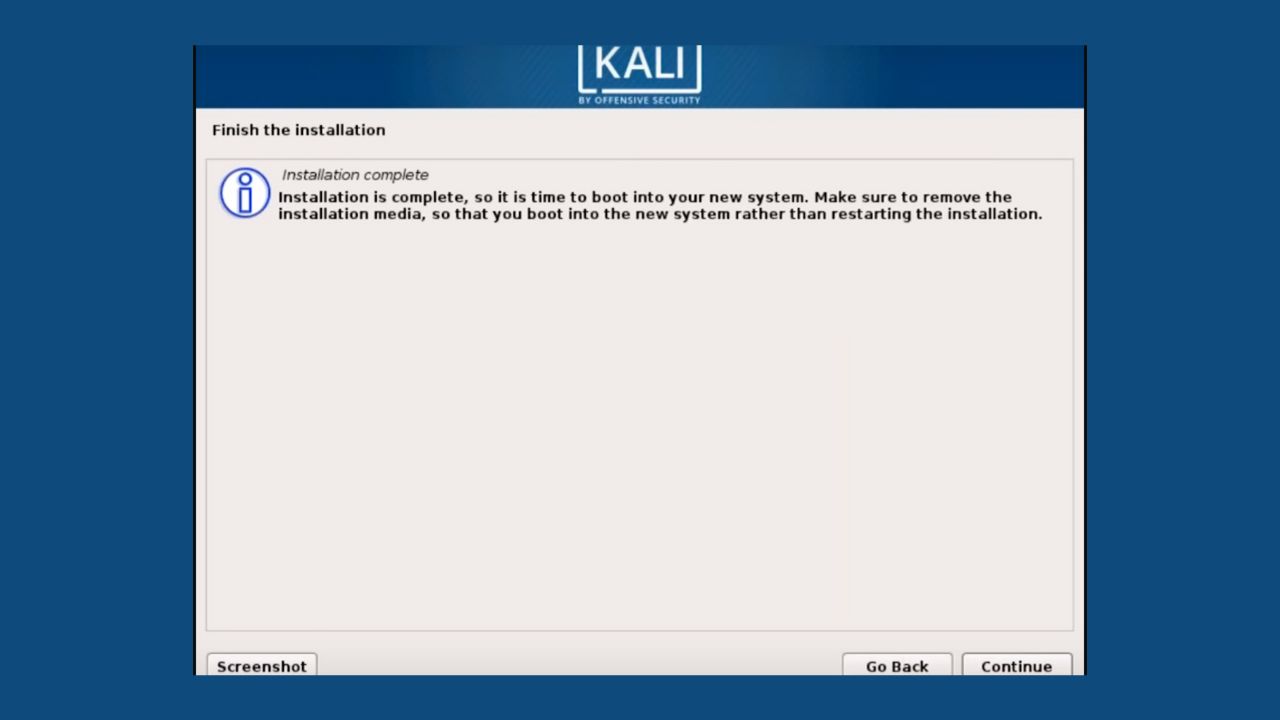
At this point, Kali Linux will be successfully installed and you are ready to begin your Kali Linux exploration! We have come to the end of the article “How to install Kali Linux on Windows 10”.
Recommended Posts:
What is Kali Linux? Advantages and Disadvantages of Kali Linux
What are the Generations of Computer and their Characteristics
Different Types of Computer Networks
How to Fix High CPU usage on Windows 10
What is Security Operations Center?
Conclusion
Now you are able to Install Kali Linux on Windows 10. With these steps, you can easily learn “How to Install Kali Linux on Windows 10“. You can also use Oracle’s VirtualBox for the Installation of Kali Linux on Windows 10. If you want to know about the Kali Linux Installation in VirtualBox then Let us know in the comment box.
Thanks for Visiting our website Solving Dad!