
Windows 11 Security Features You Should Enable Today can make a major difference in protecting your files, accounts, and personal information. Many users install Windows 11, adjust the appearance, and start working without checking the built-in security tools already available.
The good news is that Windows 11 includes several powerful protection layers, including Microsoft Defender Antivirus, Core Isolation, Secure Boot, Windows Hello, ransomware protection, and account security controls. However, some features may require manual activation, especially on systems upgraded from older Windows versions.
This guide explains which Windows 11 security settings are worth enabling, how to turn them on step by step, and which options provide the biggest security improvements without making your PC difficult to use.
Why Windows 11 Security Settings Matter More Than Ever
Modern threats are no longer limited to obvious viruses. Attackers increasingly use stolen passwords, malicious downloads, fake software updates, and phishing emails to access computers.
A typical example is a user downloading a “free” utility tool from an unknown website. The program may appear harmless, but it could silently install malware or attempt to steal browser passwords. Security features built into Windows 11 are designed to block these attacks before they cause damage.
Windows 11 also introduced stricter hardware security requirements, including TPM 2.0 and Secure Boot, which help protect the operating system from low-level attacks.
Enabling the right settings gives you:
- Better malware protection
- Stronger login security
- Protection against ransomware
- Safer web browsing
- Improved protection against unauthorized system changes
Windows 11 Security Features You Should Enable Today for Better Protection
1. Turn On Microsoft Defender Antivirus and Real-Time Protection
Microsoft Defender Antivirus is built into Windows 11 and provides continuous protection against viruses, spyware, ransomware, and other threats.
Some users disable Defender because they believe third-party antivirus software is always better. For many home users, however, Defender combined with good security practices provides strong protection without slowing down the system.
How to enable Microsoft Defender Real-Time Protection:
- Press Windows + I to open Settings.
- Select Privacy & security.
- Click Windows Security.
- Open Virus & threat protection.
- Select Manage settings under Virus & threat protection settings.
- Turn on:
- Real-time protection
- Cloud-delivered protection
- Automatic sample submission
- Tamper Protection
Tamper Protection is especially important because it prevents malicious programs from changing your security settings.
Tip:
If you install another antivirus program, Windows may automatically disable Defender’s active scanning. Avoid running multiple antivirus programs because they can conflict and reduce performance.
2. Enable Windows 11 Core Isolation and Memory Integrity
Core Isolation protects important Windows processes by separating them from normal software activity. The most important option inside this feature is Memory Integrity, which uses virtualization-based security to prevent malicious code from accessing protected areas of memory.
This is one of the most valuable Windows 11 security features for users with compatible hardware.
Steps to enable Memory Integrity:
- Open Settings using Windows + I.
- Go to Privacy & security.
- Select Windows Security.
- Click Device security.
- Under Core isolation, select Core isolation details.
- Turn on Memory integrity.
- Restart your computer.
Important notes:
- Some older drivers may not be compatible.
- If Windows reports an incompatible driver, update the driver from the hardware manufacturer.
- Do not randomly delete drivers to enable the feature.
For gaming PCs or older systems, enabling Memory Integrity may slightly affect performance in rare cases. Most modern systems handle it without noticeable changes.
3. Enable Secure Boot in Windows 11
Secure Boot prevents unauthorized software from loading before Windows starts. It protects against boot-level malware such as rootkits.
Windows 11 officially requires Secure Boot support for installation, but some systems may have it disabled after firmware changes or hardware upgrades.
Check Secure Boot status:
- Press Windows + R.
- Type:
msinfo32- Press Enter.
- Find Secure Boot State.
If it says On, Secure Boot is already enabled.
If it says Off, you may need to enable it through your motherboard’s UEFI settings.
General steps:
- Restart your computer.
- Enter UEFI/BIOS settings.
- Find the Security, Boot, or Authentication section.
- Enable Secure Boot.
- Save changes and restart.
Warning:
Changing firmware settings incorrectly can prevent Windows from booting. If BitLocker is enabled, save your recovery key before making major BIOS changes.
4. Set Up Windows Hello for Passwordless Login
Passwords remain one of the weakest points in computer security. Many users reuse passwords across websites, making stolen credentials dangerous.
Windows Hello provides safer authentication using:
- Fingerprint recognition
- Facial recognition
- PIN login
A Windows Hello PIN is stored locally on your device and is different from your Microsoft account password.
Enable Windows Hello PIN:
- Open Settings.
- Select Accounts.
- Choose Sign-in options.
- Select PIN (Windows Hello).
- Click Set up.
You can also configure fingerprint or facial recognition if your hardware supports it.
Best practice:
Use Windows Hello together with a strong Microsoft account password and two-factor authentication.
5. Turn On Controlled Folder Access Against Ransomware
Ransomware attacks work by encrypting your personal files and demanding payment. Windows 11 includes Controlled Folder Access, which prevents unauthorized applications from modifying protected folders.
Enable Controlled Folder Access:
- Open Windows Security.
- Select Virus & threat protection.
- Click Manage ransomware protection.
- Turn on Controlled folder access.
By default, Windows protects folders such as:
- Documents
- Pictures
- Videos
- Desktop
If a trusted application is blocked:
- Open Windows Security.
- Go to Virus & threat protection.
- Select Ransomware protection.
- Choose Allow an app through Controlled folder access.
Example:
A photo editing application may need access to your Pictures folder. Instead of disabling protection completely, allow only that specific application.
6. Enable SmartScreen Protection for Safer Downloads
Microsoft Defender SmartScreen checks downloaded files, websites, and applications against known threats.
It can warn you when:
- A downloaded program is suspicious
- A website is unsafe
- A file has a poor reputation
Turn on SmartScreen:
- Open Settings.
- Go to Privacy & security.
- Select Windows Security.
- Click App & browser control.
- Open Reputation-based protection settings.
- Enable:
- Check apps and files
- SmartScreen for Microsoft Edge
- Potentially unwanted app blocking
This feature is especially useful for users who frequently download utilities, drivers, or free software.
7. Use BitLocker Device Encryption
Encryption protects your data if your laptop is lost or stolen. Windows 11 Pro, Enterprise, and Education editions include full BitLocker management tools.
Some Windows 11 Home devices support automatic Device Encryption if hardware requirements are met.
Check encryption settings:
- Open Settings.
- Select Privacy & security.
- Choose Device encryption.
If available, turn it on.
For Windows 11 Pro:
- Search for Manage BitLocker.
- Open it.
- Select your drive.
- Click Turn on BitLocker.
Important:
Save your BitLocker recovery key somewhere secure. Without it, encrypted data may become inaccessible if Windows asks for recovery authentication.
8. Keep Windows Security Updates Enabled
Security features are only effective when Windows receives regular updates. Attackers often target vulnerabilities that have already been fixed by Microsoft.
Check Windows Update:
- Press Windows + I.
- Select Windows Update.
- Click Check for updates.
Also enable:
- Get the latest updates as soon as they’re available
- Automatic security updates
Avoid permanently disabling Windows Update to prevent unexpected restarts. Instead, use active hours and pause updates temporarily when necessary.
Step-by-Step: Complete Windows 11 Security Setup Checklist
Follow this quick setup process after installing or upgrading Windows 11:
Step 1: Check Windows Security Status
- Press Windows + S.
- Search Windows Security.
- Open the app.
- Review all protection areas.
Step 2: Enable Antivirus Protection
Turn on:
- Real-time protection
- Cloud protection
- Tamper Protection
Step 3: Strengthen Device Security
Enable:
- Core Isolation
- Memory Integrity
- Secure Boot
Step 4: Protect Your Account
Set up:
- Windows Hello PIN
- Fingerprint or face recognition
- Two-factor authentication
Step 5: Protect Important Files
Enable:
- Controlled Folder Access
- OneDrive backup or another trusted backup solution
Step 6: Review Browser Protection
Enable:
- SmartScreen
- Safe browsing features
- Automatic updates
Additional Windows 11 Security Tips for Power Users
Use a Standard User Account for Daily Work
Administrator accounts have greater system privileges. If malware runs under an administrator account, it can cause more damage.
For daily use:
- Open Settings.
- Go to Accounts.
- Select Other users.
- Create a standard account.
Use administrator access only when needed.
Avoid Random Registry Security Tweaks
Many online guides recommend changing Registry settings to improve Windows security. Registry edits can work, but incorrect changes may break system features.
Before modifying the Registry:
- Create a System Restore point.
- Export the registry key you change.
- Follow instructions from trusted sources.
Group Policy settings are usually safer on Windows 11 Pro editions.
Check Security Settings After Major Hardware Changes
After upgrading:
- Motherboard firmware
- Storage drives
- Windows editions
- System resets
Review:
- Secure Boot status
- BitLocker status
- Windows Hello settings
- Defender protection settings
A security feature that was active before an upgrade may not always remain configured afterward.
Common Mistakes That Reduce Windows 11 Security
Even with strong built-in tools, users often weaken their own protection.
Avoid:
- Downloading cracked software
- Disabling SmartScreen permanently
- Using the same password everywhere
- Ignoring Windows updates
- Running unknown programs as administrator
- Keeping old browser extensions installed
Security is not one setting. It is a combination of multiple protections working together.
Conclusion: Build a Safer Windows 11 Setup Today
The best Windows 11 Security Features You Should Enable Today are the ones that protect your computer without disrupting daily use. Features like Microsoft Defender, Memory Integrity, Windows Hello, Secure Boot, Controlled Folder Access, and BitLocker create multiple layers of defense.
You do not need expensive security software to improve your protection. Start by reviewing Windows Security settings, enabling the features your hardware supports, and keeping your system updated.
A few minutes spent configuring these options today can prevent hours of troubleshooting after a malware infection or data loss incident.
Also Read: Linux vs Windows 11 Privacy: Is Linux Better?
FAQ Section
What security features should I enable first in Windows 11?
Start with Microsoft Defender Real-Time Protection, Tamper Protection, Windows Hello, SmartScreen, and automatic Windows Updates. These provide strong protection with minimal impact on performance.
Is Windows 11 security good enough without antivirus software?
For many users, Microsoft Defender provides reliable built-in protection. However, users with specialized security needs may choose additional security tools.
How do I check if my Windows 11 PC is secure?
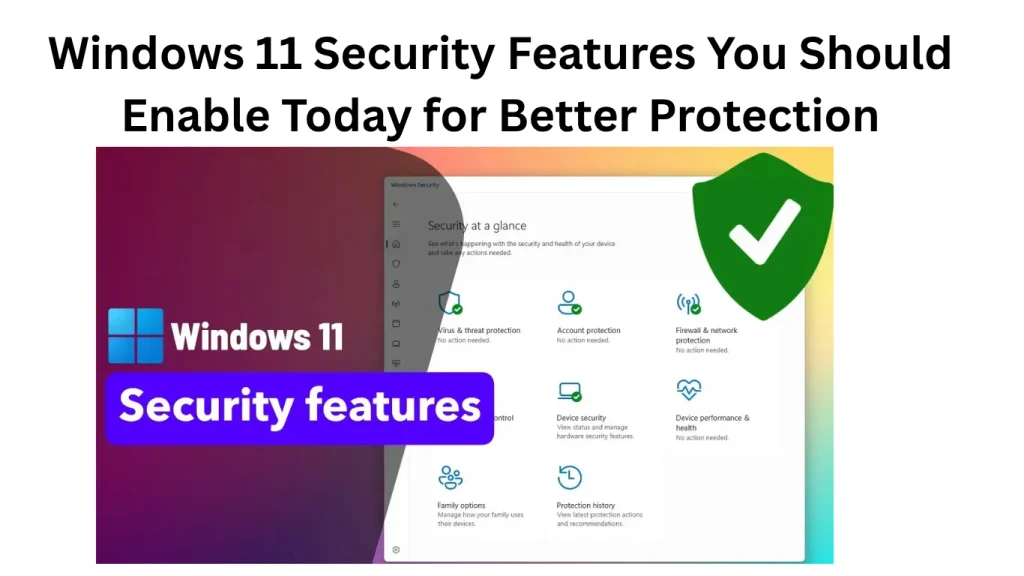
Open Windows Security from the Start menu and review Virus & threat protection, Account protection, Firewall protection, and Device security sections.
Does enabling Memory Integrity slow down Windows 11?
On most modern computers, the performance impact is very small. Older systems or incompatible drivers may experience issues.
Should I enable BitLocker on Windows 11?
If your PC contains sensitive files, BitLocker or Device Encryption is highly recommended because it protects your data if the device is lost or stolen.
Also Read: