Setting up a dual boot (Windows + Linux) system is a fantastic way to enjoy the best of both worlds. Whether you’re a Windows enthusiast who wants to explore Linux, or a Linux user needing Windows for specific software, dual booting gives you the flexibility to switch between operating systems on the same PC. But if you rush into it, you might end up losing data or facing boot errors. Don’t worry—I’m going to guide you through the process safely, step by step.
Why You Should Consider Dual Booting
Before we dive into the setup, let’s quickly cover why dual booting is beneficial:
- Flexibility – Access Windows-only software while enjoying Linux’s open-source environment.
- Learning – Gain hands-on experience with Linux without completely giving up Windows.
- Performance – Unlike virtual machines, dual booting allows each OS to use your hardware fully.
- Backup Options – You can isolate one OS for work and another for experimentation.
Also Read: How to Fix “Reboot and Select Proper Boot Device” Error in Windows 10/11
Step 1: Backup Your Data
This is the most crucial step. Mistakes during partitioning or installation can wipe your drives.
- Use Windows Backup or tools like Macrium Reflect to create a full system image.
- Copy important documents, media, and settings to an external drive.
- Double-check that your backups are complete before proceeding.
Remember: Safety first. It’s better to spend 10 extra minutes on backups than regret it later.
Step 2: Prepare Your Windows System
If you already have Windows installed, you need to prepare your disk:
- Disk Cleanup – Remove unnecessary files to free space.
- Shrink Windows Partition – Open
Disk Management→ Right-click on your Windows partition → Select “Shrink Volume.” Allocate enough space for Linux (20–50 GB is ideal for beginners). - Disable Fast Startup – Go to Control Panel → Power Options → Choose “What the power buttons do” → Uncheck “Turn on fast startup.”
- Check Disk for Errors – Run
chkdskto make sure Windows partitions are healthy.
Step 3: Create a Bootable Linux USB
Next, you need a Linux distribution on a USB stick:
- Download your preferred Linux ISO (Ubuntu is beginner-friendly).
- Use Rufus or Balena Etcher to create a bootable USB drive.
- Make sure to select UEFI if your system uses UEFI firmware.
Pro tip: Stick with a lightweight Linux version if your system has limited RAM or CPU power.
Step 4: Boot into Linux Installer
- Restart your PC and enter the BIOS/UEFI (usually by pressing
F2,Del, orF12). - Change the boot order to prioritize your USB drive.
- Boot from the USB and start the Linux installation.
You should now see the Linux installer screen. Don’t panic—it’s easier than it looks!
Step 5: Partition Your Disk for Linux
This is where dual booting happens:
- Select “Something else” in the installer to manually configure partitions.
- Identify the free space you created earlier from Windows.
- Create these partitions for Linux:
- Root (
/) – At least 20 GB - Swap – Equal to your RAM (optional for SSD users)
- Home (
/home) – Remaining space for files and settings
- Root (
Important: Avoid modifying the Windows partition. Only use the free space you created.
Step 6: Install Linux Bootloader Safely
Linux uses GRUB as its bootloader.
- During installation, make sure GRUB installs to the main disk (e.g.,
/dev/sda), not a partition. - GRUB will automatically detect Windows and add it to the boot menu.
This ensures you can choose between Windows and Linux every time you start your computer.
Step 7: Complete Installation and Reboot
- Finish the installation and remove the USB drive.
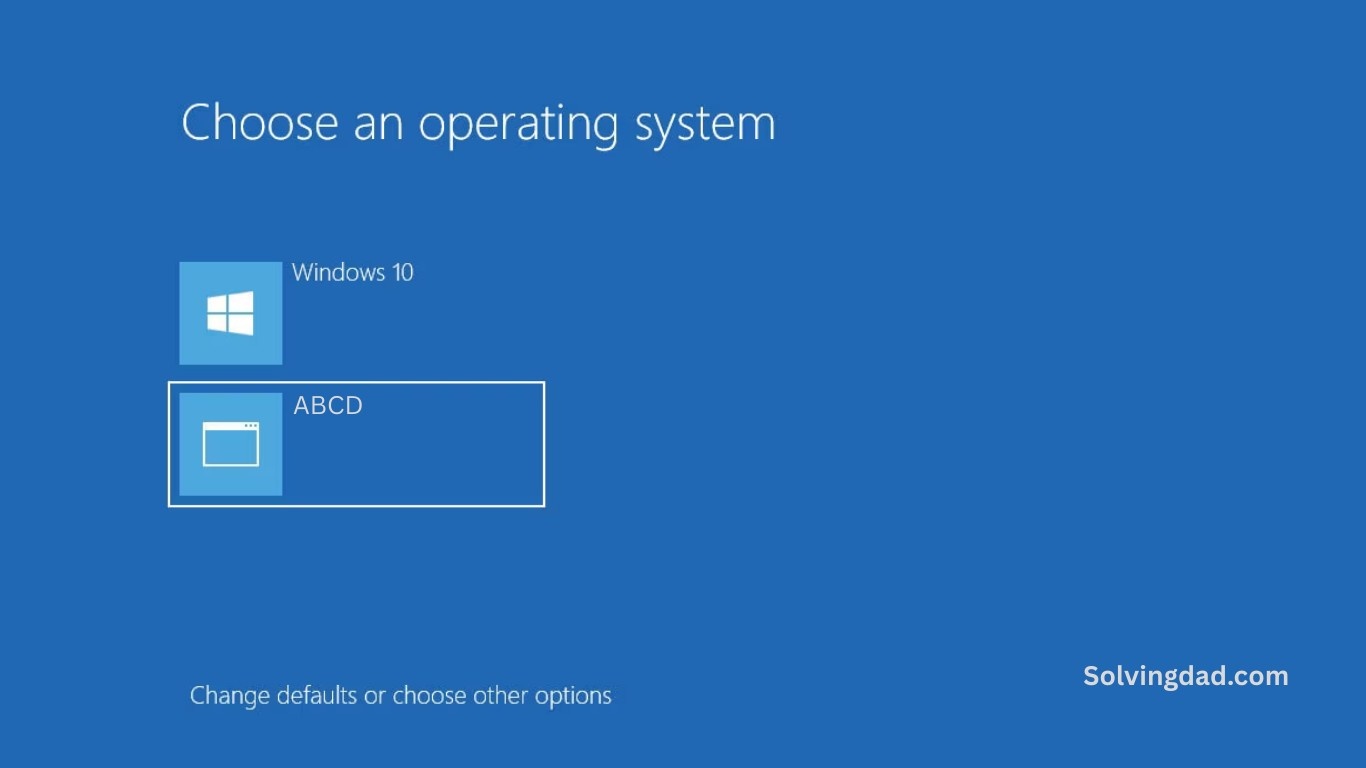
- Reboot your system. You should see the GRUB menu with options for Linux and Windows.
- Test both OSes to confirm everything works.
Step 8: Post-Installation Tips
- Update Linux – Open terminal and run
sudo apt update && sudo apt upgrade. - Install Drivers – Linux usually detects hardware automatically, but check graphics and Wi-Fi drivers.
- Customize GRUB – You can change default boot OS in
grub-customizer. - Install Essential Software – Browsers, editors, and tools you’ll need.
FAQs
Q1: Can I remove Linux later without affecting Windows?
Yes, but you need to delete Linux partitions and restore the Windows bootloader using a Windows recovery disk.
Q2: Which Linux distro is best for dual boot beginners?
Ubuntu and Linux Mint are user-friendly and widely supported.
Q3: Will dual boot slow down my PC?
No, both OSes perform independently. Performance is almost the same as a single OS.
Q4: Can I share files between Windows and Linux?
Yes, Linux can read/write to NTFS partitions, and Windows can read Linux partitions with additional tools.
Q5: Is dual boot safer than using a virtual machine?
Dual boot uses full hardware power, while VMs are safer but slower and more resource-intensive.
Setting up a dual boot (Windows + Linux) system doesn’t have to be intimidating. By following these steps, backing up your data, and taking your time with partitioning, you can enjoy the best of both operating systems safely. You’ll soon feel comfortable switching between Windows and Linux like a pro!
Also Read: